
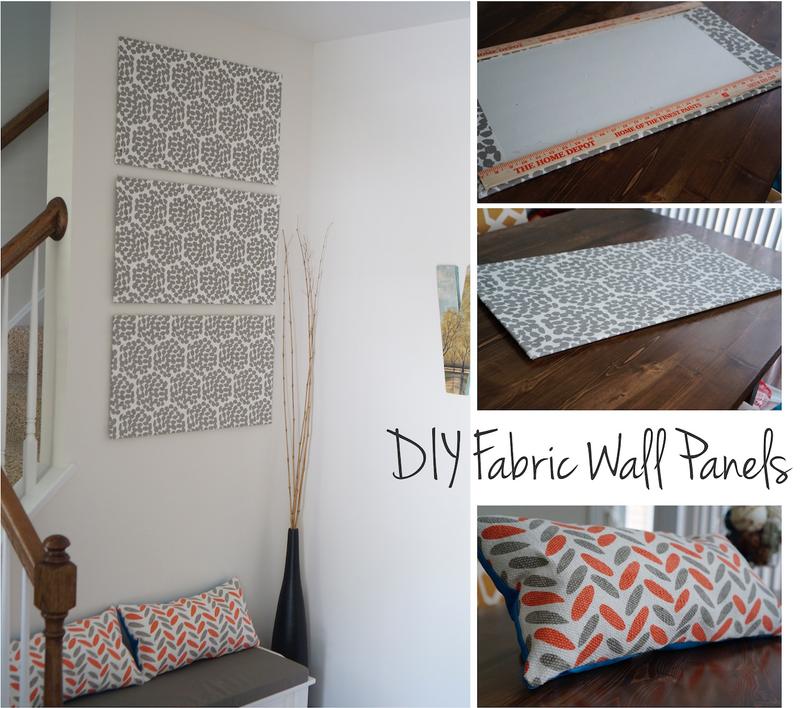
DIY Fabric Wall Panels
When we moved into our home, one of the most exciting aspects was having a blank canvas to decorate exactly the way we wanted. But at the same time I’ve never had so many walls to fill so it has also been quite overwhelming. Here, we spruced up our entrance way by adding simple DIY fabric panels and updated cushions. This has been one of the most successful and easy DIY projects I have done and they look awesome! Sewing your own pillows can save so much money and it’s an easy way to infuse color into a space with minimum commitment - if you tire of the look, just change the fabric. Here’s how I made the wall panels.
Supplies
- 1 yd Fabric. As with most of my DIY projects, this was by far the most difficult part. - $10.20
- Foam board (20”×30” from the dollar store $1) - in the future I will splurge on thicker foam board from Home Depot because I had to set text books on these boards for several days to flatten them out. - $3
- Mod Podge - $6.29
- 3M Mounting Strips
Steps
- I first selected a fabric that would make a subtle statement but still be neutral enough to easily match the rest of the decor.
- Cut the foam board to size. My panels are 16”×30”
- Use glue (I used Mod Podge) to attach the fabric to the board. Be careful because the glue may seep through the fabric.
- Fold the excess fabric over the edge as if you are wrapping a gift and glue it. Optional: I glued 2 yard sticks ($0.69 each) to the back of each board for extra support and to keep the panels flat.
- Hang the panels with 3M mounting strips. I used 1 large strip for each panel then a little bit of ticky tack on each corner.